
Terrain: islands and water
Draw, adjust and name islands, create rivers and lakes, read the map and set the starting point.
The pictures show the editor with sample data. The orange frames and numbers refer to the steps in the text.
Drawing an island
What for?
Every world starts as an empty ocean. Land is made of islands that you place with a few clicks and then reshape.
How it works
- Pick the “Terrain” mode on the left.
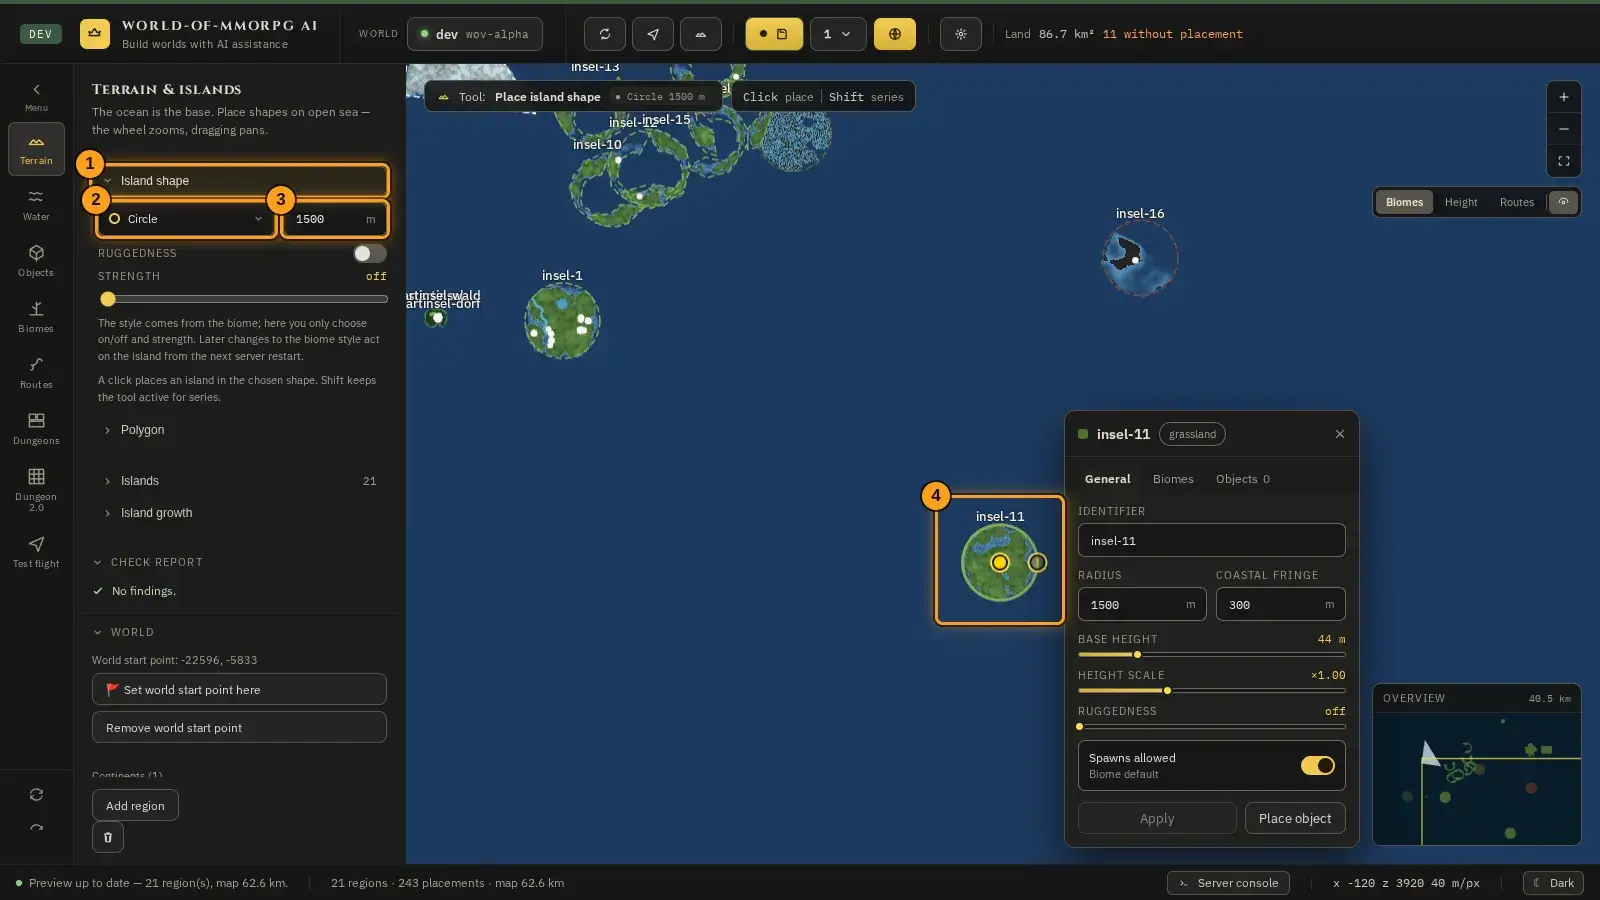
- Unfold the “Island shape” menu item (1) in the side panel. That makes the tool active. A second click folds it in again and ends the tool; at most one menu item is open at a time.
- Pick the shape (2): circle, oval, long island, crescent, jagged coast or plateau. Next to it (3) you set the base size in metres. Below it is the “Ruggedness” row with a switch and a strength: it decides whether the new island gets rugged ground. It is pre-set from the style of the biome (in the starting stock: off); the island only stores on/off and the strength, the style stays with the biome, and a change there acts on all islands of this biome; details in the Biomes chapter under “Relief: rugged ground”. The same row is in the “Polygon” menu item.
- Click on the map (4). The island appears right away. Holding Shift places several islands in a row.
- Handles sit on the edge of the selected island. Drag them to change its shape, or drag the centre to move the island.
- For a free shape unfold the “Polygon” menu item: click the corner points one after another and close the shape by clicking the first point, with the “Close polygon” button in the menu item, or with a double-click. Esc cancels.
Tip: Start with a simple shape and refine it with the handles. A mis-click is gone quickly with Ctrl+Z. You give the island a name such as “Heimatinsel” afterwards in the island window (see “Adjusting an island”); without a name, map and list show the identifier.
Adjusting an island
What for?
Every island has properties: a name, a size, a base height and a biome. This is where you set how it looks and behaves.
How it works
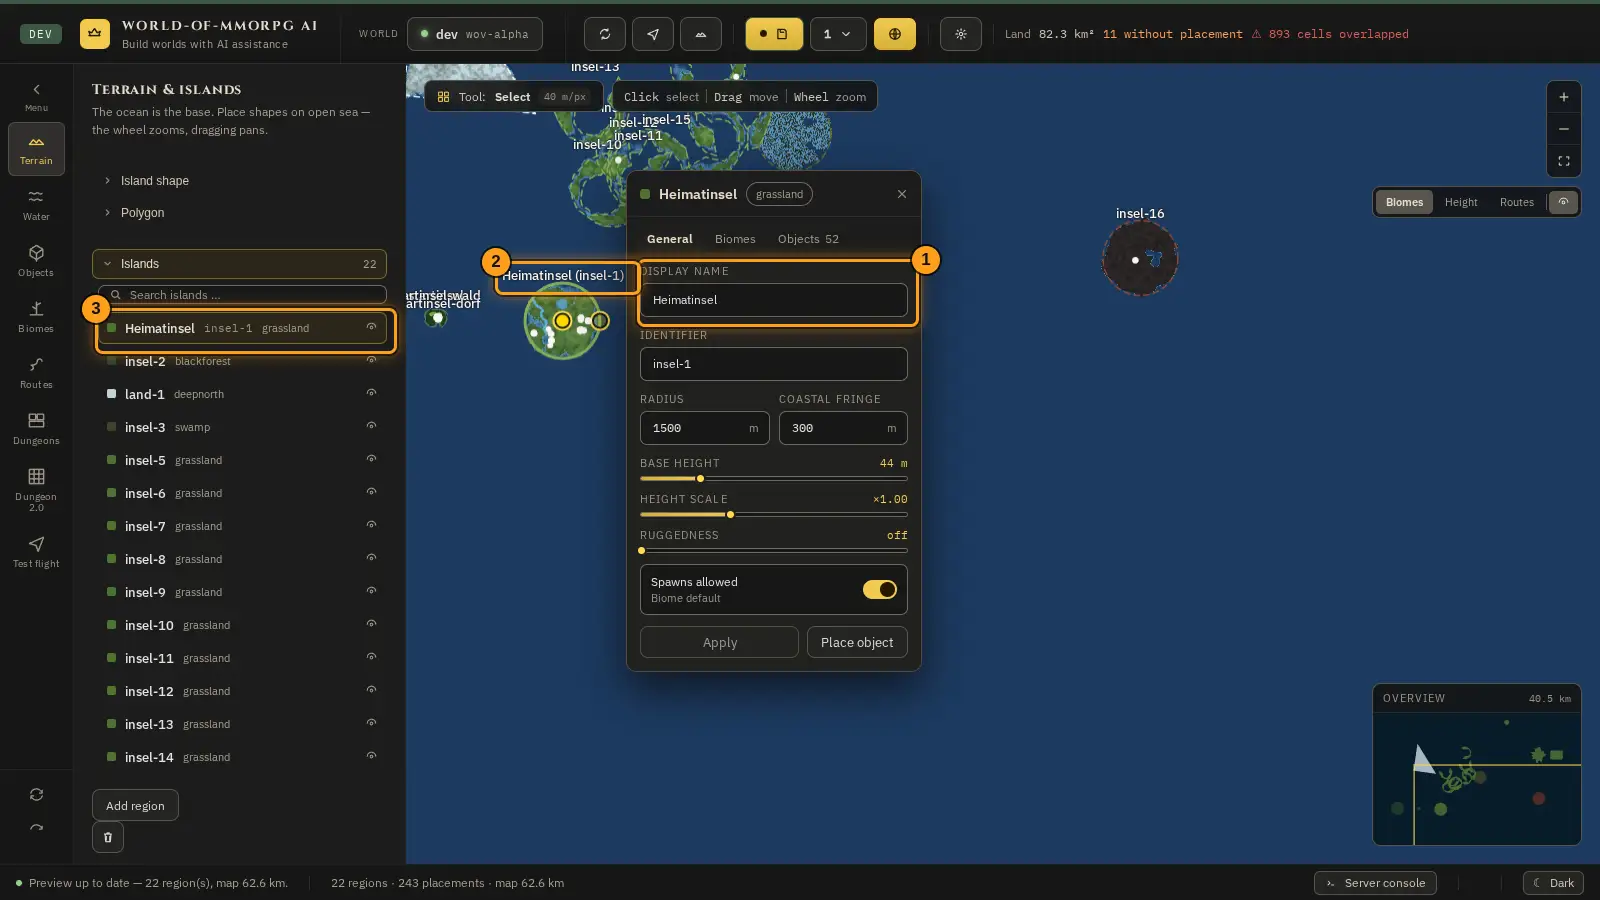
- Click the island on the map or in the list on the left (menu item “Islands”). Its window opens.
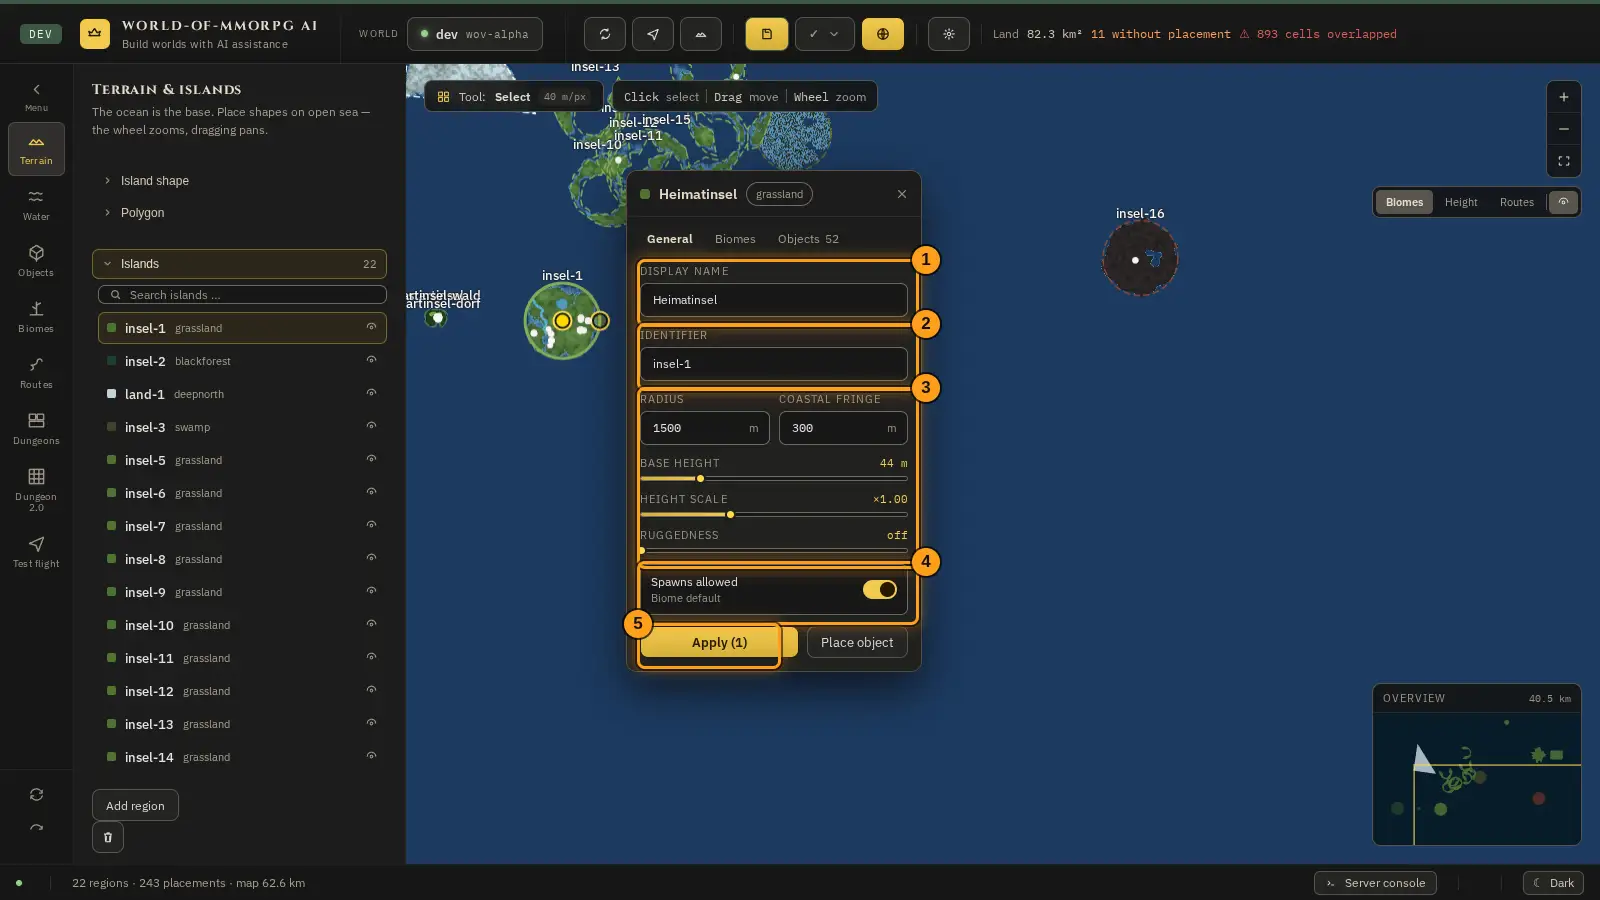
- At the top of the “General” tab is the “Display name” field (1): an optional display name such as “Heimatinsel”, at most 40 characters. It appears on the map (with the identifier in brackets) and in the island list, and the list search finds name and identifier. If the field stays empty, the identifier is shown. Below it is the identifier (2), which names the island uniquely and does not follow the name. After that you set (3) radius, coastal fringe, base height, height factor and ruggedness. The coastal fringe is the edge where the land runs out towards the water.
- The “Spawns allowed” switch (4) decides whether creatures may appear on the island. “Biome default” uses the biome’s preset.
- In the “Biomes” tab you choose the island’s biome, in the “Objects” tab you see what stands on it.
- “Apply” (5) puts your changes into the draft. “Place object” switches straight to the object tool. A name change can afterwards be taken back with Ctrl+Z and restored with Ctrl+Y; special characters such as control and writing-direction characters are removed from the name.
Tip: In the “Islands” menu item a click on a row selects the island, the eye next to it centres the map on it. What stands on the island you see in the “Objects” mode. The sliders for forest share, growth density, tree spacing, conifer nests and forest grain are in the “Island growth” menu item; select an island first.
If something does not work
- “Apply” is greyed out and cannot be clicked.
- There is nothing to apply yet. Change a value in the window first; then the button becomes active.
Creating rivers and lakes
What for?
Rivers and lakes cut into the terrain and give your world water for villages, paths and stories to grow around.
How it works
- Pick the “Water” mode on the left.
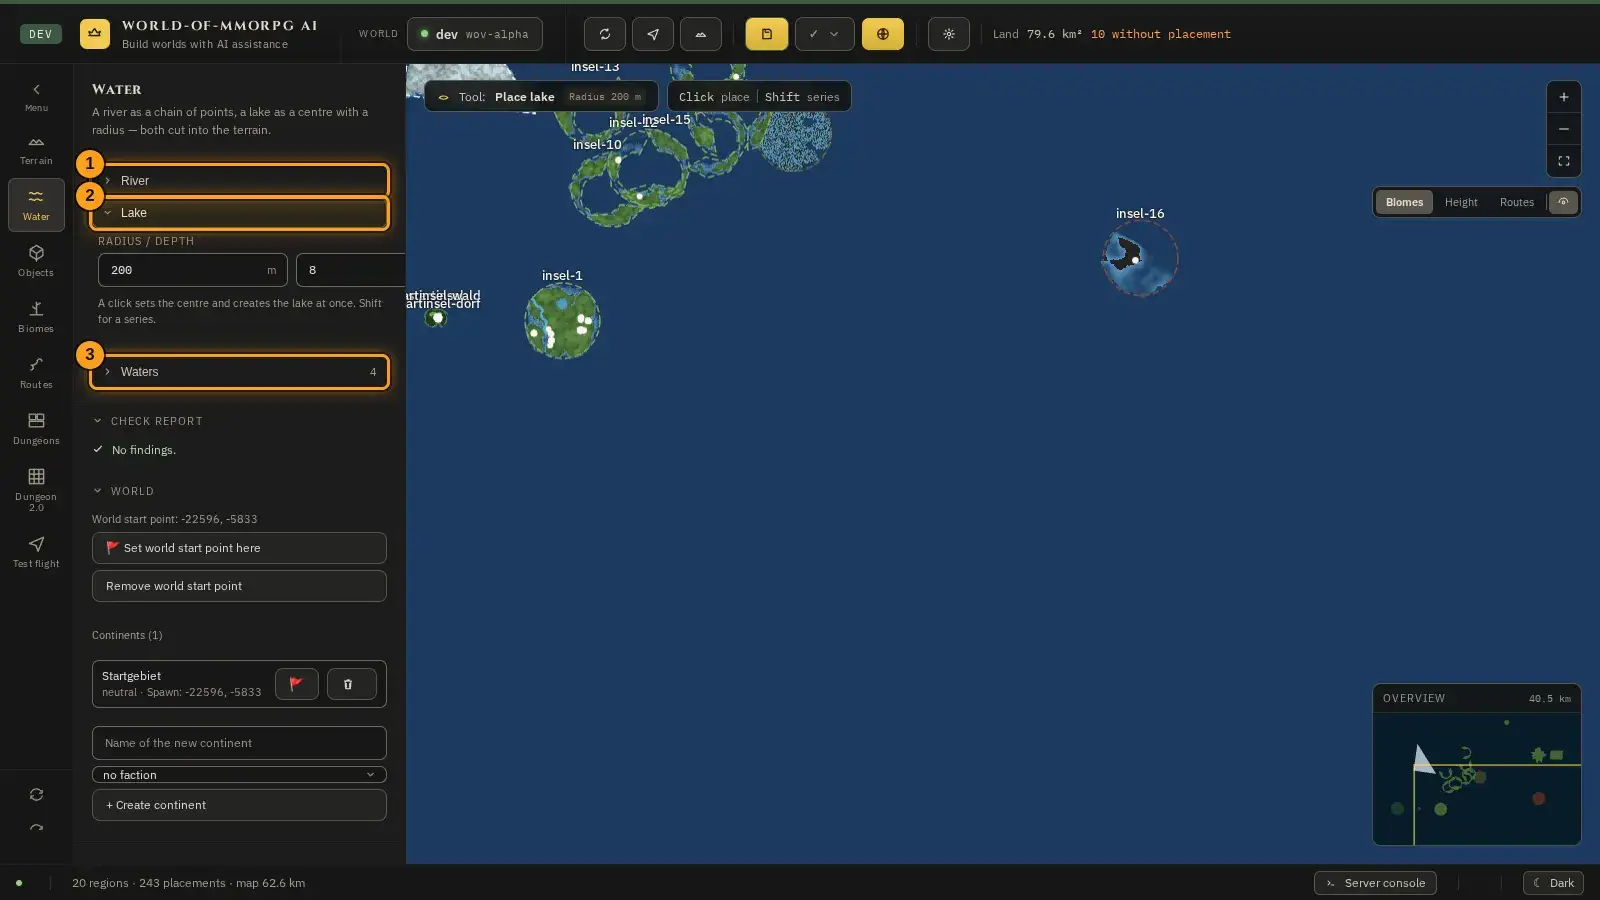
- For a lake unfold the “Lake” menu item (2). Set radius and depth (default: 200 m and 8 m) and click on the map: the lake appears at once. Shift places several.
- For a river unfold the “River” menu item (1). Set width and depth and click the points of its course one after another. A double-click finishes the river, Esc cancels.
- All waters are listed in the “Waters” menu item (3). The eye centres the map on the water, the cross deletes it (Ctrl+Z brings it back). The search field above filters by name and kind.
Tip: Draw a river from its source to its mouth and do not make it too narrow: a wider river is easier to see on the map.
Reading the map: biomes, height, routes
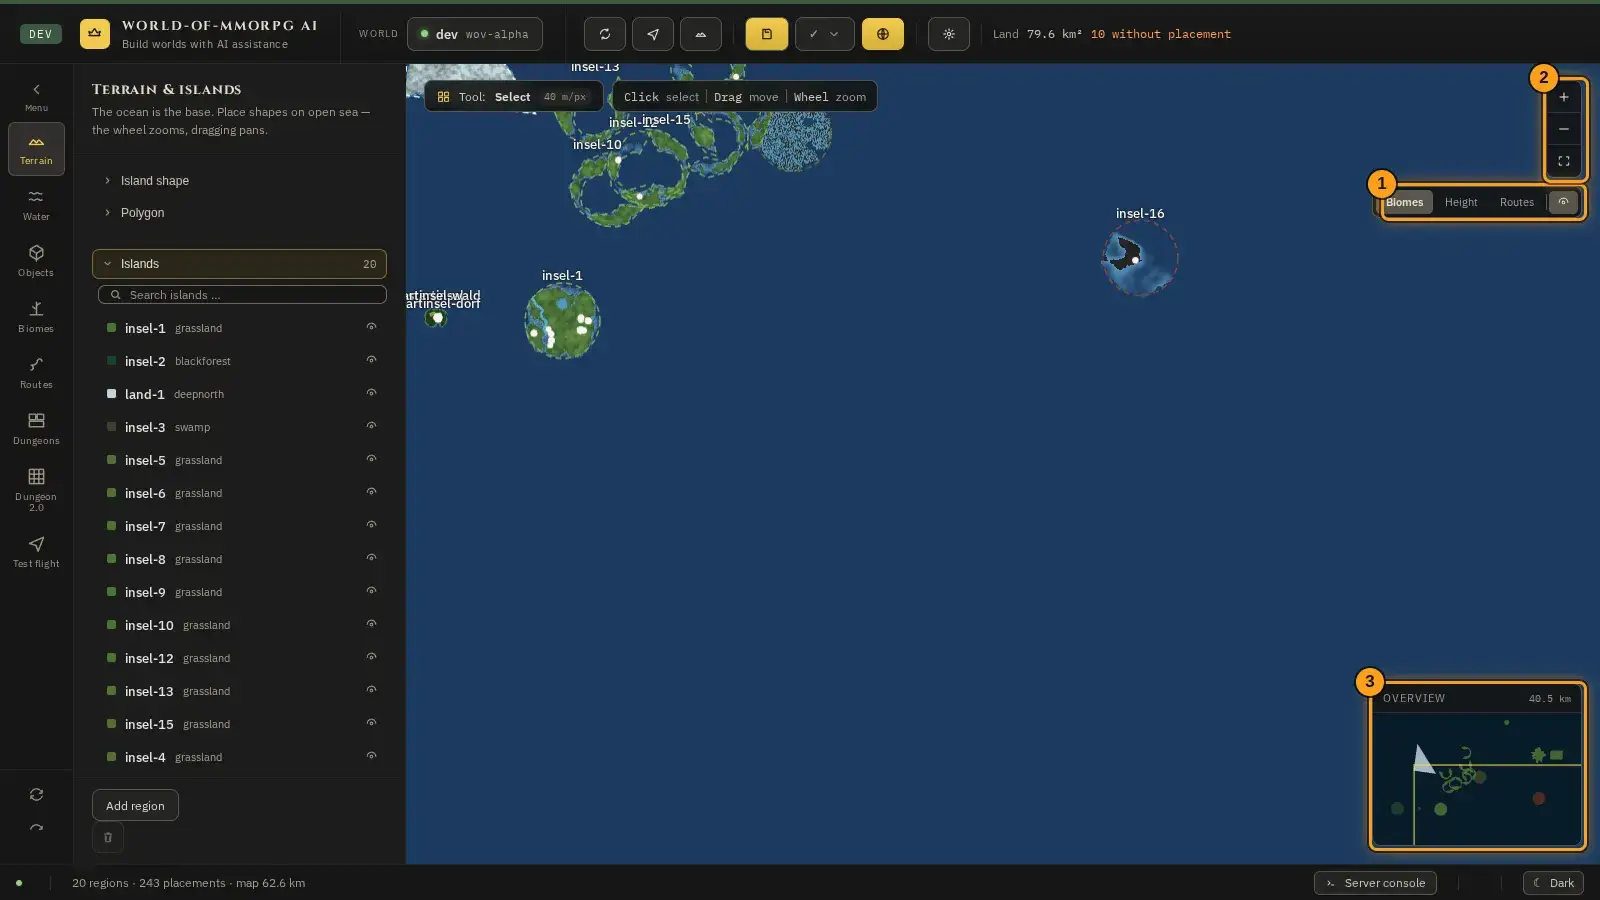
What for?
The map has three layers. That way you check your land from different angles.
How it works
- At the top right of the map (1) you switch between the three layers “Biomes”, “Height” and “Routes”. Just switch, the map redraws at once. The eye icon switches the labels with the island names on or off.
- The buttons below (2) zoom. The scale is shown in the tool strip at the top, for example “40 m/px”.
- The overview at the bottom right (3) shows the whole world with its edge length. A click moves the map.
If something does not work
- The map only shows dots or outlines, but no picture of the land.
- The preview is recalculated for a moment after every change. Wait a moment, or click “recalculate map preview now” in the header bar, the first button to the right of the “World” field.
Starting point and check report
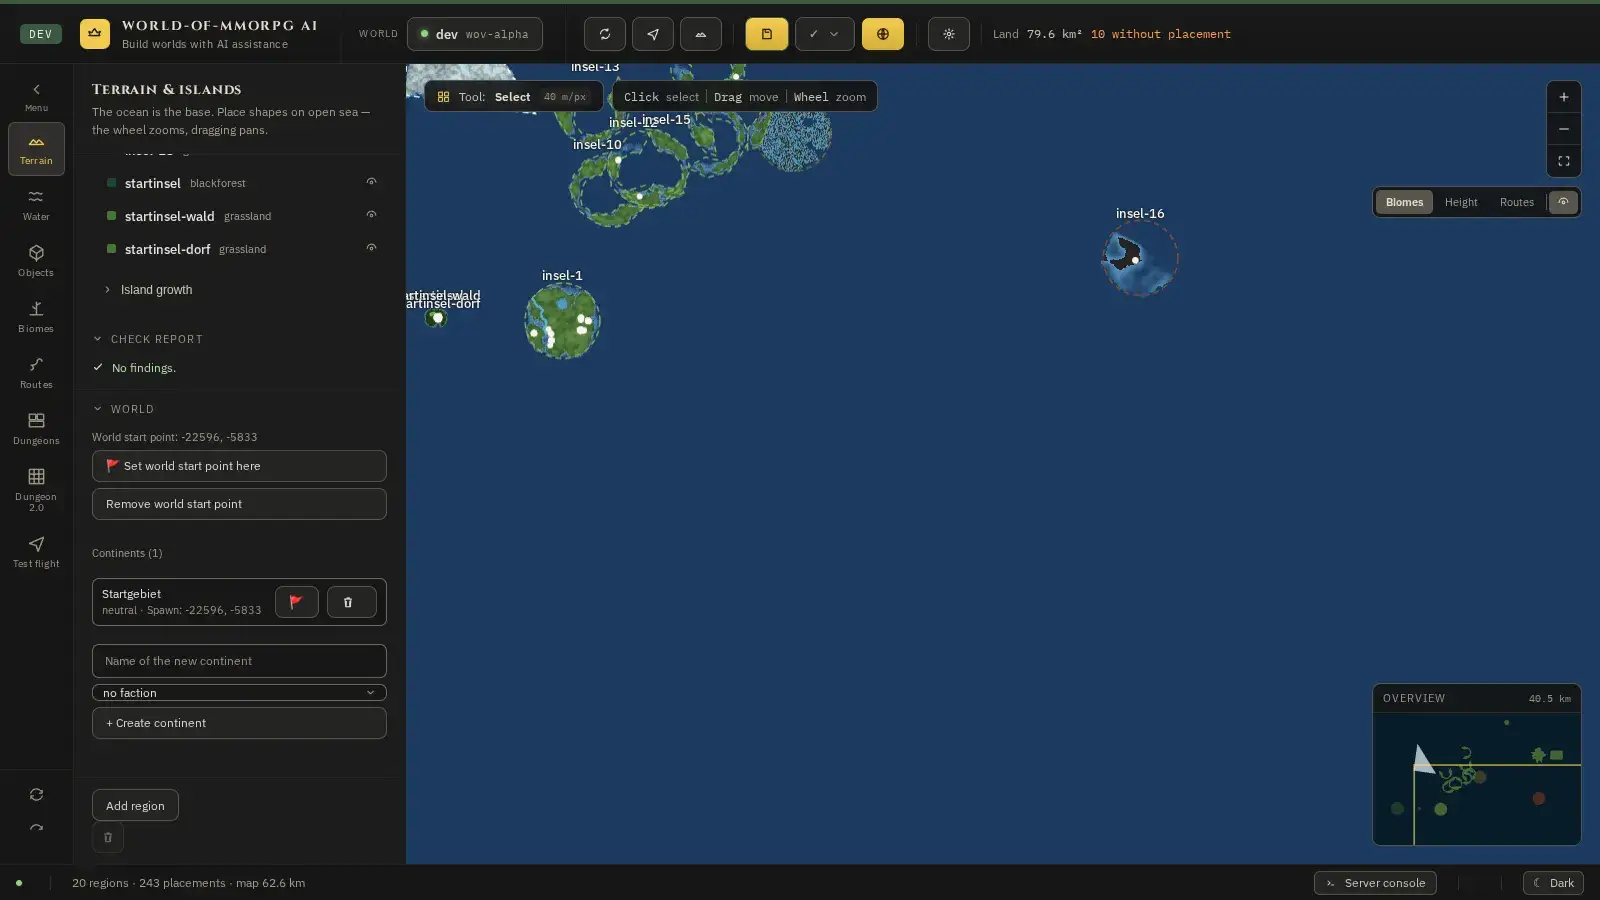
What for?
The starting point decides where new players arrive in your world. The check report warns you when something about the map is not right.
How it works
- In the “Terrain” mode, scroll the side panel down to the “World” section.
- Click “Set world start point here” and then on the spot on the map where players should begin. “Remove world start point” removes it again; players then begin at the origin of the world.
- Under “Continents” you create areas with their own starting point and a faction. Enter a name, choose the faction and click “+ Create continent”.
- The check report further up in the side panel lists the findings, for example islands that overlap too much. Clicking a finding jumps to the spot on the map.
Tip: Put the starting point on land and preferably away from steep coasts. How to read the findings in the check report is explained in the “Frequently asked questions” book.